Labels and printers
Labels let your crew scan a tool to check it out, check it in or look it up. QuipTrak makes the labels as a PDF. You print the PDF on your own printer.
Who can do this: staff (owners, admins and attendants). Everyone else sees “Only owners, admins and attendants can print labels.”
Choose a label size
Section titled “Choose a label size”Pick the size that matches your label stock. QuipTrak has these sizes:
| Size | Notes |
|---|---|
| Brother QL, 62 mm continuous | The default |
| Brother QL, 29 × 90 mm | |
| Avery 22805 (1.5 in squares) | 24 per letter sheet |
| Avery 5160 (address labels) | 30 per letter sheet |
QuipTrak remembers your last choice in this browser.
Print labels
Section titled “Print labels”You can start from three places:
- Tools list: select Select, tick the tools, then select Print labels (N). You can print up to 500 at once.
- Tool page: select Print label.
- Labels page (under Setup in the menu): print labels for bins and consumables, or select Print blank codes.
- Bins, Item types and Kits pages: select Print label on a row.
Then follow these steps:
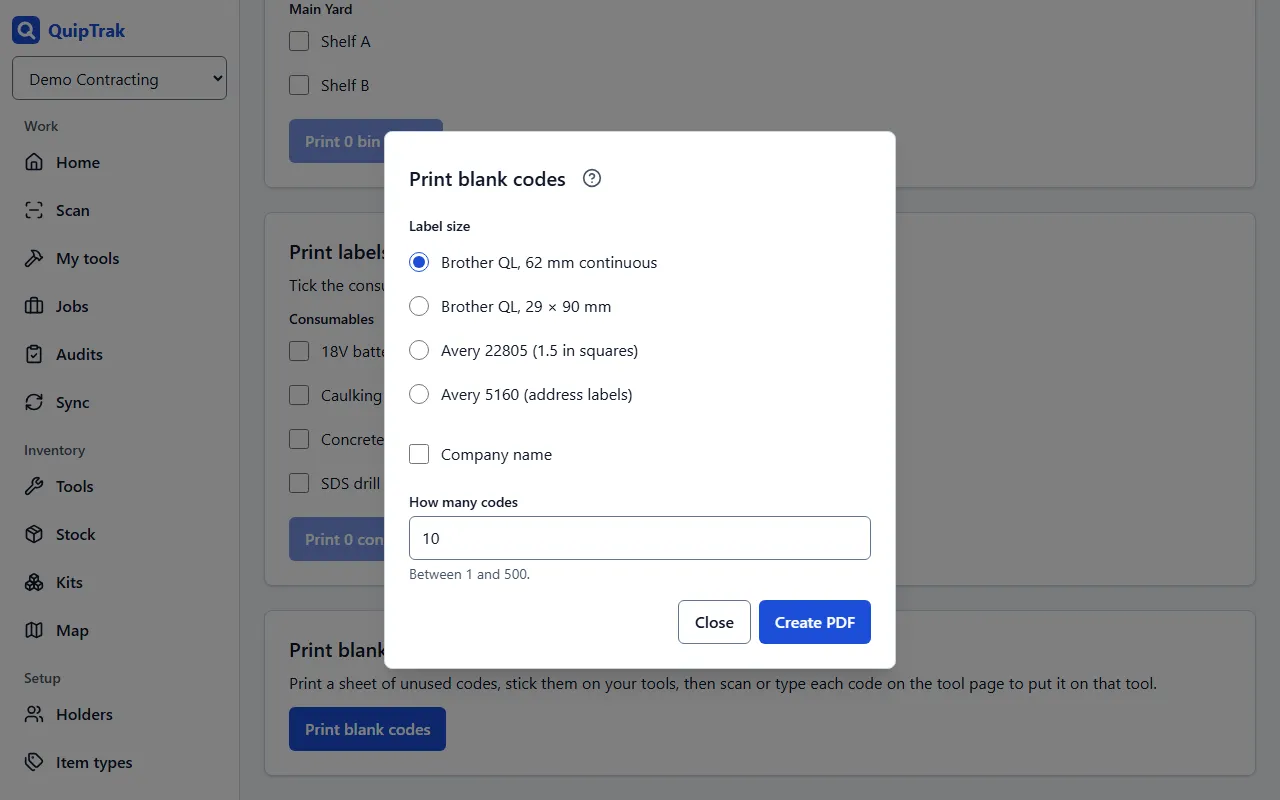
- Set the options:
- Company name: off by default.
- Asset number: on by default.
- How many codes: 1 to 500.
- Select Create PDF. Wait for Your labels are ready.
- Select Open PDF and print it.
You can print the PDF from any printer. You do not need a driver or an app. QuipTrak keeps the PDF for 24 hours.
How codes work
Section titled “How codes work”A tool gets its own code the first time you print its label. Printing the label again prints the same code.
Make blank codes
Section titled “Make blank codes”A blank code is a label that is not on a tool yet. You attach it to a tool when you scan it.
- On the Labels page, select Print blank codes. Then create and print the PDF.
- Stick one code on a tool.
- Scan the code. The result offers Bind to an existing tool or Add a new tool.
Add a code by hand
Section titled “Add a code by hand”You can attach a code to a tool yourself. You need a connection for this.
- Open the tool and go to Labels and codes.
- Select Add a code.
- Enter the code in Code and select Add code.
A tool can have up to 20 labels. If you try to add a code that is in use, you see “That label is already on another tool.” This also happens when the code is on a bin, item type or kit.
Replace a damaged label
Section titled “Replace a damaged label”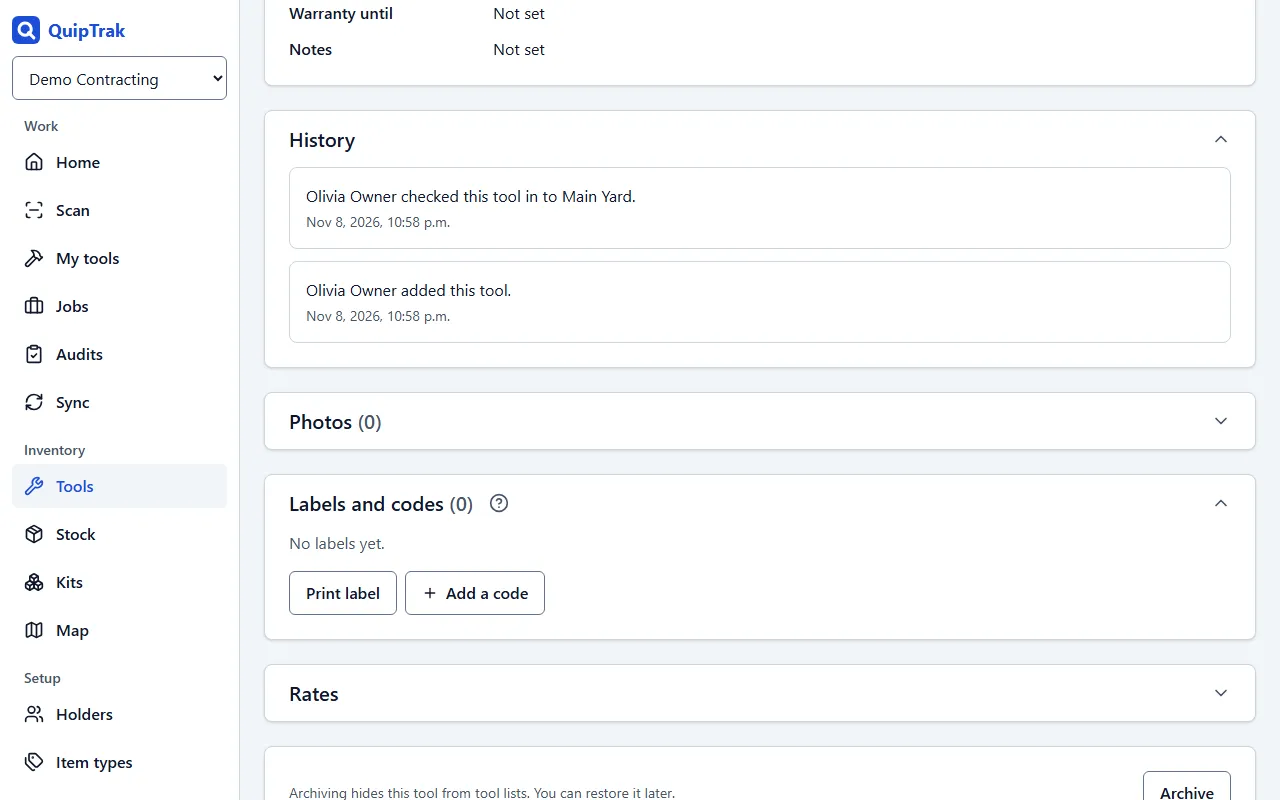
- Open the tool. Next to the damaged code, select Remove.
- In the “Remove this code?” prompt, select Remove code.
- Select Print label. QuipTrak makes a new code for the tool.
A removed code is no longer linked to the tool. If someone scans it, the app says the label is not on a tool yet. The tool’s history shows labels that were put on and removed.
Errors
Section titled “Errors”- “The labels could not be made. Please try again.” Try again.
- “This is taking too long. Please try again in a moment.” This appears after about a minute.
- “This tool is archived. Restore it first.” Restore the tool, then print the label.